


Is your 2013 Hyundai Elantra showing signs of a failing alternator? Maybe your battery keeps dying, or the dashboard lights flicker unexpectedly.
Fixing this yourself might sound tricky, but with the right steps, you can replace the alternator and save both time and money. In this guide, you’ll find clear, simple instructions that make the process manageable—even if you’re not a car expert.
Keep reading to get your Elantra back on the road smoothly and confidently.
Tools And Materials Needed
Replacing the alternator on a 2013 Hyundai Elantra needs specific tools and materials. Using the right items makes the job easier and safer. Prepare everything before starting to avoid delays or mistakes.
This list covers what you need to remove and install the alternator properly. Each tool has a role in the process.
Basic Hand Tools
You will need a socket set with ratchet and extensions. Common sizes include 10mm, 12mm, and 14mm sockets. A wrench set helps to reach tight spots. Screwdrivers, both flathead and Phillips, are useful for clips and covers.
Specialty Tools
A serpentine belt tool or breaker bar is needed to release belt tension. This tool makes removing the belt easier. A multimeter helps to test the new alternator’s output after installation.
Replacement Parts And Materials
Get a new alternator designed for the 2013 Hyundai Elantra. Also, buy a new serpentine belt if the old one is worn. Electrical contact cleaner can help clean battery terminals. Use dielectric grease to protect electrical connections.
Safety Equipment
Wear safety gloves to protect your hands. Safety glasses shield your eyes from debris. Work in a well-ventilated area to avoid fumes.

Credit: www.amazon.com
Preparing Your Vehicle
Preparing your 2013 Hyundai Elantra for an alternator replacement sets the stage for a smooth repair. Proper preparation helps avoid accidents and damage. This step saves time and effort later. Take time to get everything ready before starting the job.
Safety Precautions
Wear safety glasses to protect your eyes from debris. Use gloves to keep your hands clean and safe. Work in a well-ventilated area to avoid fumes. Keep tools organized to prevent slips and mistakes. Avoid loose clothing or jewelry that can get caught in parts.
Disconnecting The Battery
Turn off the engine and remove the key. Locate the battery under the hood on the driver’s side. Use a wrench to loosen the negative terminal clamp first. Remove the negative cable and secure it away from the battery. Repeat the process with the positive terminal. Disconnecting the battery prevents electrical shocks and shorts during work.
Locating The Alternator
Finding the alternator on a 2013 Hyundai Elantra is the first step. It is a key part of the car’s electrical system. The alternator charges the battery and powers the electrical parts while the engine runs.
The alternator sits in the engine bay, attached to the engine. Knowing its exact location makes replacement easier and faster. This guide helps you spot the alternator with simple steps.
Open The Hood And Locate The Engine
Start by opening the car’s hood. Secure it with the hood prop rod. Look at the engine area. The alternator is near the front of the engine.
Identify The Belt System
Find the serpentine belt or drive belt. This belt loops around several pulleys. The alternator pulley is one of them. The belt moves the alternator to generate power.
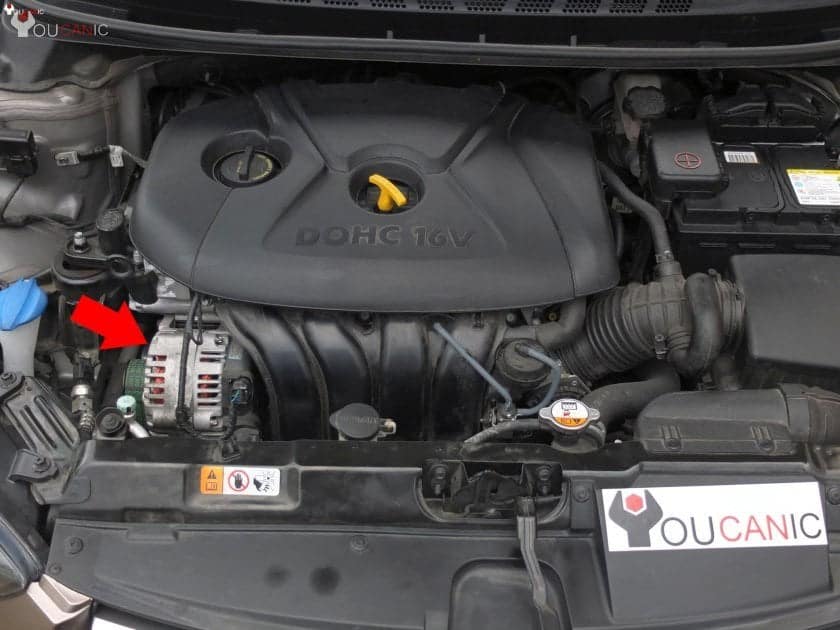
Spot The Alternator’s Shape And Size
The alternator is round and metal. It is smaller than the engine but bigger than most parts. It has vents or slots for cooling. You can see wires connected to it.
Check The Electrical Connections
Look for a thick wire and a plug on the alternator. These carry electricity to the battery and the car. The wires usually have plastic covers or connectors.
Locate The Mounting Bolts
The alternator is held by bolts on the engine. Spot these bolts to prepare for removal. They usually sit on the top and side of the alternator.
Removing The Old Alternator
Removing the old alternator from a 2013 Hyundai Elantra requires careful steps. This part is key for the car’s electrical system. Take your time to avoid damage or injury. Follow these steps to remove the old alternator safely and correctly.
Releasing Belt Tension
Start by loosening the tension on the serpentine belt. Use a wrench to turn the tensioner pulley. This action releases the belt’s tight grip on the alternator pulley. Slide the belt off the alternator carefully. Keep the belt in good condition for reuse.
Unbolting The Alternator
Next, locate the bolts holding the alternator in place. There are usually two or three bolts. Use a socket wrench to remove them. Support the alternator with your hand as you unbolt. Remove all bolts completely before pulling the alternator out.
Disconnecting Electrical Connections
Before removing the alternator fully, disconnect its electrical wires. Start with the main power cable by loosening the nut. Then, unplug the smaller connector carefully. Make sure no wires remain attached. This prevents damage and allows safe removal.
Installing The New Alternator
Installing the new alternator on a 2013 Hyundai Elantra requires careful steps. This ensures the alternator works well and lasts long. Follow these instructions for a smooth installation process.
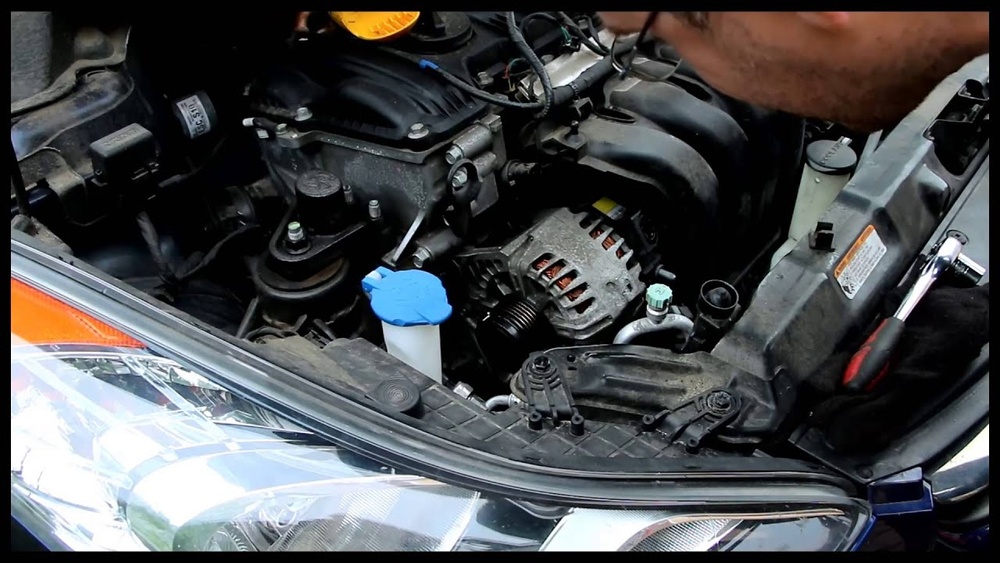
Positioning The Alternator
Place the new alternator in the same spot as the old one. Align it carefully with the mounting bracket. Make sure the pulley lines up with the belt system. Check that the alternator sits firmly without wobbling.
Securing Bolts
Insert the mounting bolts into their holes. Tighten them by hand at first to avoid cross-threading. Use a wrench to firmly secure each bolt. Do not over-tighten to prevent damage. Confirm all bolts hold the alternator firmly in place.
Reconnecting Electrical Components
Reconnect the wiring harness to the alternator. Attach the battery cable to the positive terminal. Ensure all connections are clean and tight. Loose wires can cause charging problems. Double-check every connection before finishing the job.
Credit: www.youcanic.com
Reattaching The Belt
Reattaching the belt on your 2013 Hyundai Elantra is a key step after replacing the alternator. The belt drives the alternator and other engine parts. Without it, the engine won’t work properly. Take your time to install it right.
Start by checking the belt for any damage. Use a new belt if the old one looks worn or cracked. A good belt lasts longer and keeps your engine running smoothly.
Locate The Belt Path
Find the belt routing diagram under the hood or in the manual. This shows how the belt wraps around the pulleys. Follow the path carefully to avoid mistakes. A wrong belt path can cause noise and damage.
Position The Belt On Pulleys
Place the belt over each pulley by hand. Begin with the crankshaft pulley at the bottom. Then move the belt over the alternator, tensioner, and other pulleys. Make sure the belt sits in the grooves correctly.
Use The Tensioner To Tighten The Belt
Locate the belt tensioner, a spring-loaded pulley. Use a wrench to rotate the tensioner and create slack. Slide the belt over the tensioner pulley. Slowly release the tensioner to tighten the belt.
Check Belt Alignment And Tension
Ensure the belt is straight on all pulleys. Check that it has enough tension but is not too tight. Press the belt in the middle; it should move about half an inch. Proper tension prevents slipping and wear.
Final Checks And Testing
After installing the new alternator on your 2013 Hyundai Elantra, it is crucial to perform final checks. These steps ensure the alternator works properly and your vehicle runs smoothly. Careful testing prevents future problems and keeps your car’s electrical system healthy.
Reconnecting The Battery
Start by reconnecting the battery terminals. Tighten the positive and negative cables securely. This step restores power to your vehicle’s electrical system. Make sure no tools or wires touch the battery terminals during this process. A secure connection avoids sparks and electrical shorts.
Starting The Engine
Next, turn the ignition key to start the engine. Listen carefully for any unusual sounds. The engine should run smoothly without hesitation or strange noises. Watch the dashboard for warning lights. The battery or alternator light should turn off quickly after the engine starts.
Verifying Charging System
Use a multimeter to check the charging voltage at the battery terminals. A healthy alternator should show between 13.8 and 14.5 volts. If the voltage is too low or too high, the alternator may not be working correctly. Also, check that all electrical accessories function properly. This confirms the charging system is stable and reliable.
Troubleshooting Common Issues
Troubleshooting common issues helps find problems before replacing the alternator. It saves time and money. Identifying the right issue ensures the repair works well. Most alternator problems show clear signs. Recognizing these signs guides the next steps.
Checking The Battery And Electrical Connections
Start by testing the battery voltage. A weak battery can mimic alternator failure. Clean all electrical connections from battery to alternator. Dirt or corrosion causes poor contact. Tighten loose battery terminals. A secure connection improves power flow.
Testing The Alternator Belt
Look at the alternator belt for cracks or wear. A loose belt slips and reduces charging power. Press the belt to check its tension. Replace the belt if it feels soft or cracked. Proper tension keeps the alternator turning smoothly.
Measuring Alternator Output Voltage
Use a multimeter to measure the alternator voltage. Start the engine and check the voltage at the battery terminals. Voltage should be between 13.5 and 14.5 volts. Lower voltage means the alternator is not charging well. Higher voltage can damage the battery.
Listening For Unusual Noises
Pay attention to sounds from the alternator. Grinding or squealing noises indicate worn bearings or belt problems. Strange noises mean the alternator may fail soon. Early detection allows fixing problems before total failure.
Maintenance Tips To Extend Alternator Life
Keeping your alternator in good shape helps avoid costly repairs. Simple care steps can make it last longer. These tips help maintain your 2013 Hyundai Elantra’s alternator effectively.
Proper maintenance reduces wear and tear. It also ensures your car’s electrical system works well. Follow these easy steps to protect your alternator.
Check And Replace Drive Belts Regularly
Drive belts connect the alternator to the engine. Worn or loose belts cause poor alternator performance. Inspect belts often for cracks or fraying. Replace them every 60,000 miles or sooner if damaged.
Keep Electrical Connections Clean
Corroded or loose electrical connections reduce alternator output. Check battery terminals and alternator wires. Clean them with a wire brush and tighten any loose ends. This keeps electrical flow steady and strong.
Avoid Overloading The Electrical System
Too many accessories strain the alternator. Limit use of high-power devices like extra lights or stereo systems. Overloading makes the alternator work harder and fail sooner. Use power wisely to extend its life.
Inspect Battery Health Frequently
A bad battery stresses the alternator. Test your battery regularly for weak charge or corrosion. Replace a failing battery quickly. A healthy battery helps the alternator run smoothly without extra effort.
Listen For Unusual Noises
Strange sounds from the engine area signal alternator issues. Squealing or grinding noises need immediate attention. Early detection can prevent bigger alternator problems. Stay alert to keep your car safe.

Credit: www.youtube.com
Frequently Asked Questions
How Do I Know If My Alternator Needs Replacement?
Signs include dim lights, battery warning, or car stalling. Check for unusual noises or electrical issues. A failing alternator reduces battery charging.
What Tools Are Required To Replace A 2013 Hyundai Elantra Alternator?
You’ll need a socket set, wrenches, screwdrivers, and a belt tensioner tool. Safety gloves and jack stands are also helpful for access.
How Long Does It Take To Replace The Alternator?
Replacing the alternator usually takes about 1 to 2 hours for a DIYer. Time varies based on skill level and tool availability.
Can I Replace The Alternator Without Disconnecting The Battery?
No, always disconnect the battery first. This prevents electrical shocks and protects your vehicle’s electronic components during replacement.
Conclusion
Replacing the alternator on your 2013 Hyundai Elantra is doable. Follow the steps carefully for safety and success. Take your time and double-check each part. Your car will run smoother with a new alternator. Regular maintenance keeps your vehicle reliable and safe.
Don’t rush; patience makes the job easier. You’ve got the knowledge to fix it yourself. Keep tools organized and work in a clean space. Enjoy the satisfaction of completing the repair on your own.