


If you own an Alfa Romeo Giulia, you know how important it is to keep it looking sharp and fully legal. Installing a front license plate might seem tricky, but it doesn’t have to be.
In this guide, you’ll find simple, step-by-step instructions to get your front plate mounted quickly and securely. Whether you’re doing it for the first time or need a refresher, you’ll learn exactly what tools you need and how to avoid common mistakes.
Keep reading to make sure your Giulia stays both stylish and street-ready.
Tools And Materials Needed
Installing a front license plate on your Alfa Romeo Giulia requires a few basic tools and materials. Having the right items ready makes the process easier and faster. This section lists everything you need to complete the job without hassle.
Tools Needed
- Electric drill or screwdriver
- Measuring tape or ruler
- Marker or pencil
- Level tool
- Socket wrench set
Materials Needed
- Front license plate bracket (specific to Alfa Romeo Giulia)
- License plate screws and bolts
- Plastic anchors (if required for mounting)
- Rubber washers to prevent vibration
Optional Accessories
- Protective gloves for hand safety
- Cleaning cloth to wipe the area
- Rust-resistant spray for screws
Credit: www.cravenspeed.com
Locate The Mounting Area
Start by finding the flat space on the front bumper. This spot is made for the license plate. Make sure it is clean and clear before attaching.
Understanding The Front Bumper Layout
The front bumper of the Alfa Romeo Giulia has a specific area made for the license plate. This spot is usually flat and central on the bumper. It is designed to hold the plate firmly without blocking air vents or sensors.
Check for any small holes or markings on the bumper. These signs show where the screws or clips will fit. The mounting area might have a cover or a plastic piece that needs removal before installation.
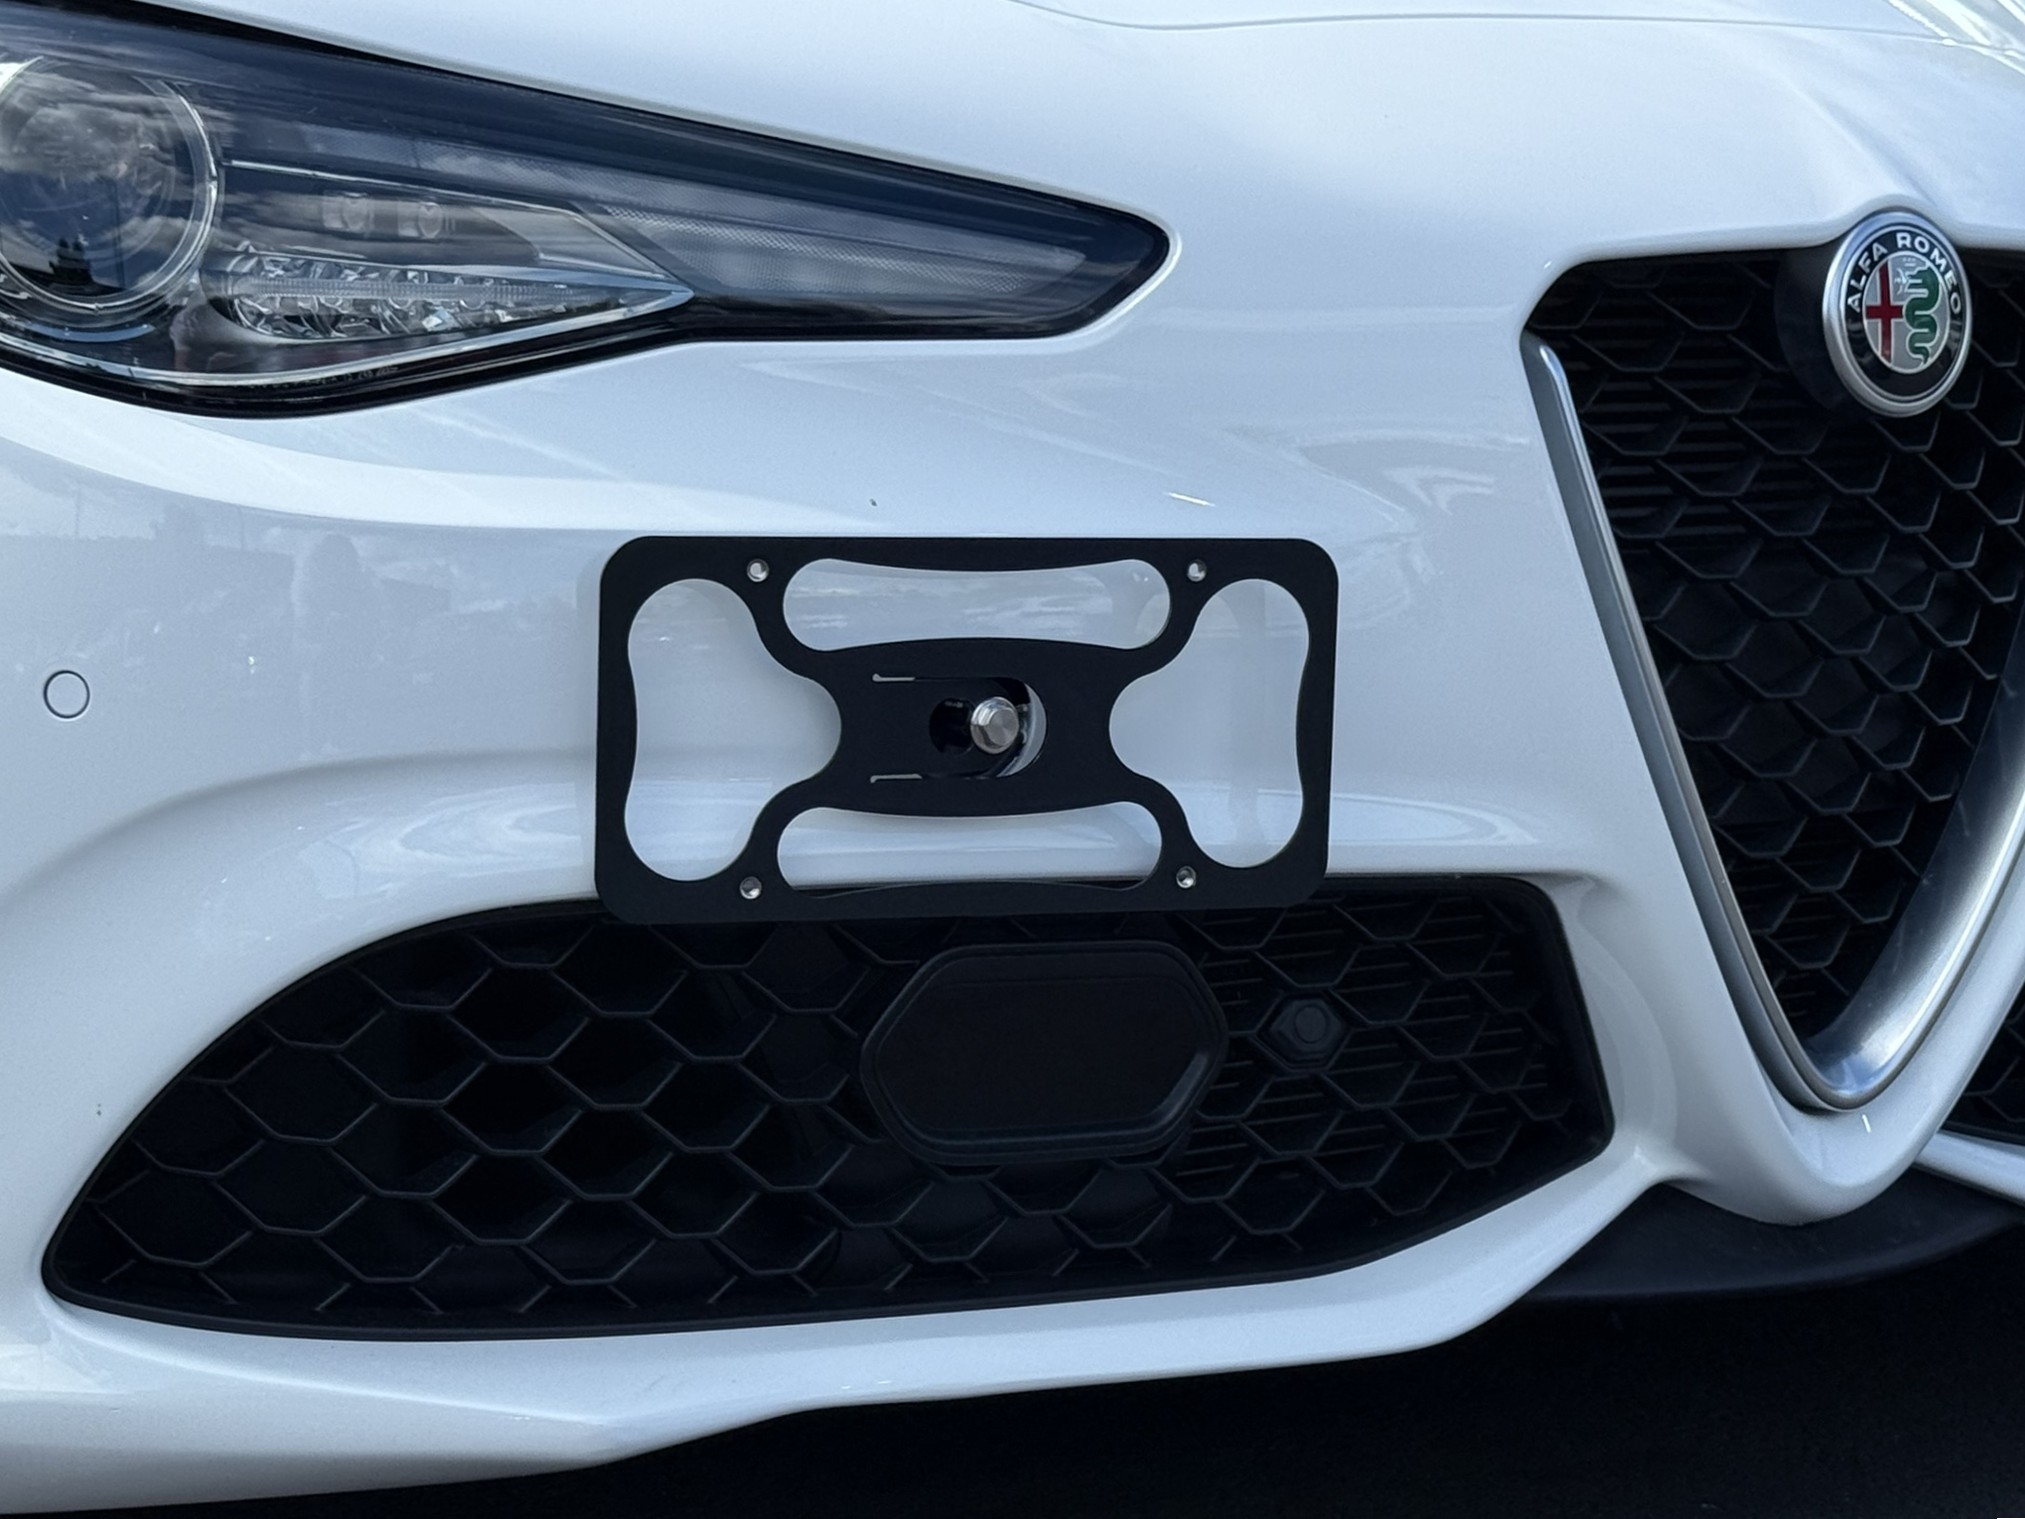
Checking For Factory Mounting Bracket
Some Giulia models come with a factory-installed license plate bracket. This bracket fits perfectly and makes mounting easier. Look closely at the front bumper’s center to find it.
If the bracket is missing, you will need to attach one before fixing the plate. Using the right bracket ensures the plate stays secure and looks neat.
Measuring And Marking The Exact Spot
Measure the center of the bumper to place the plate evenly. Use a tape measure for accuracy. Mark the spot lightly with a pencil or masking tape.
Make sure the marks line up horizontally and vertically. This step helps avoid crooked or uneven mounting. Double-check the measurements before drilling any holes.
Prepare The License Plate Bracket
Preparing the license plate bracket is an essential step before installing the front plate on your Alfa Romeo Giulia. This process ensures the bracket fits well and holds the plate securely. Proper preparation also prevents damage to your car’s front bumper.
Start by gathering all parts and tools needed for the bracket setup. Check the bracket for any defects or missing pieces. A smooth and clean bracket surface helps the plate stay firmly attached.
Clean The Bracket Surface
Use a soft cloth and mild cleaner to wipe the bracket. Dirt or grease can stop the plate from sticking properly. Let the bracket dry completely before moving on.
Check The Bracket Fit
Hold the bracket up to the front bumper. Make sure it lines up with the mounting holes. Adjust the bracket if it does not sit flat or fit snugly.
Gather The Mounting Hardware
Find screws, bolts, and any clips needed for attachment. Use the hardware that came with your bracket or the car. Using the right parts prevents loose or shaky plates.
Prepare The Tools
Get a screwdriver, wrench, or drill ready. Having tools at hand speeds up the installation. Double-check tool sizes match the hardware for a smooth process.

Credit: www.cravenspeed.com
Align The Bracket On The Car
Aligning the bracket on your Alfa Romeo Giulia is a key step. It ensures the front license plate fits well and looks right. Proper alignment prevents damage to the car and the plate. Follow clear steps to make this easy and precise.
Locate The Mounting Points On The Car
First, find the exact spots where the bracket will attach. These are usually small holes or marked areas on the front bumper. Use a flashlight if needed. Check both sides to confirm the correct position.
Hold The Bracket In Place
Position the bracket carefully against the mounting points. Make sure it sits flat and straight. Hold it steady with one hand. This helps to avoid shifting while you work.
Check The Bracket Alignment
Look closely to see if the bracket is level. Use a small level tool or eyeball it. Adjust the bracket until it looks centered and balanced. This step ensures the license plate will not tilt.
Mark The Screw Holes
With the bracket held in place, mark where the screws will go. Use a pencil or marker. These marks guide you when drilling or screwing. Take your time to be accurate.
Mark And Drill Holes
Marking and drilling holes is a key step to install the front license plate on your Alfa Romeo Giulia. It ensures the plate fits perfectly and stays secure. Doing this carefully prevents damage to your car’s bumper.
Take your time to measure and mark the exact spots. Precise marks make drilling easier and keep the plate straight. Use the right tools for clean and accurate holes.
Gather Tools And Materials
Get a tape measure, pencil, drill, and drill bits. Use a level to keep marks even. Have the license plate bracket and screws ready.
Measure And Mark Hole Locations
Hold the plate bracket against the bumper. Use the tape measure to find the center point. Mark the spots for drilling with a pencil. Double-check the marks with the level.
Prepare The Drill
Choose a drill bit that matches the screw size. Attach it firmly to the drill. Set the drill to a slow speed for better control.
Drill The Holes Carefully
Place the drill bit on the mark. Drill straight and steady to avoid slipping. Stop once the hole is through the bumper. Clean any plastic debris from the holes.

Credit: www.cravenspeed.com
Attach The Bracket Securely
Attaching the bracket securely is a key step in installing a front license plate on your Alfa Romeo Giulia. The bracket holds the plate firmly in place. A loose bracket can cause noise and damage. Follow clear steps to ensure the bracket stays tight and stable.
Start by aligning the bracket with the mounting holes on your car’s front bumper. Check that the bracket fits flush against the surface. This helps prevent any wobbling or rattling while driving.
Use The Right Tools
Gather a screwdriver and a wrench that fit the screws and bolts. Using the correct tools avoids stripping screws. This makes the job easier and faster. Avoid using tools that do not fit well.
Tighten Screws Evenly
Insert all screws loosely first. Then, tighten them gradually in a crisscross pattern. This ensures even pressure on the bracket. Tightening one screw fully before the others may cause the bracket to bend.
Check The Bracket’s Stability
After tightening, shake the bracket gently. It should not move or wiggle. If it does, loosen screws and re-tighten carefully. A stable bracket keeps the license plate secure on bumpy roads.
Mount The License Plate
Mounting the front license plate on your Alfa Romeo Giulia is a simple step. It secures the plate properly and keeps your car looking neat. Follow these steps carefully for a perfect fit.
Prepare The Mounting Area
Clean the front bumper surface where the plate will go. Use a cloth and mild cleaner to remove dirt and dust. Dry the area completely before starting.
Align The License Plate Bracket
Hold the license plate bracket against the bumper. Line up the holes on the bracket with the pre-drilled spots on the car. Check the bracket is straight and centered.
Attach The Bracket With Screws
Use the screws provided with the kit to fix the bracket. Insert screws carefully into the holes. Tighten them with a screwdriver until snug, but do not overtighten.
Secure The License Plate
Place the license plate onto the mounted bracket. Align the plate holes with the bracket holes. Insert screws through the plate into the bracket and tighten securely.
Check Stability And Finish
After installing the front license plate on your Alfa Romeo Giulia, checking its stability and finish is important. This step ensures the plate stays secure and looks neat. A loose plate can cause noise and fall off, which is unsafe and illegal.
Take a moment to examine the plate’s hold and overall appearance. A well-installed plate should feel firm without wobbling. The finish should match the car’s style and not show damage from the installation process.
Check For Firm Attachment
Press gently on different parts of the license plate. It should not move or wiggle. Tighten screws if you find any loose spots. Use the correct screwdriver to avoid stripping the screws.
Inspect For Proper Alignment
Look at the plate from the front and sides. It must sit straight and level. A crooked plate can affect your car’s look and may not meet legal rules. Adjust the bracket or screws to fix alignment.
Examine Surface Finish
Ensure the plate surface is clean and undamaged. Check for scratches or paint chips around the mounting area. Clean any dirt or fingerprints with a soft cloth. A clean finish improves the overall appearance.
Listen For Rattling Sounds
Drive your car slowly and listen for rattles near the plate. Noise means the plate is not secure. Stop and tighten all fasteners again. Proper stability keeps noise away and protects your plate.
Tips For Maintaining The Plate
Keeping the front license plate on your Alfa Romeo Giulia clean and secure is important. A well-maintained plate looks good and lasts longer. Dirt, rust, and loose screws can cause damage and make the plate hard to read. Follow these simple tips to keep your plate in great shape.
Clean The Plate Regularly
Use a soft cloth and mild soap to clean the plate. Avoid harsh chemicals that may damage the paint or numbers. Rinse with water and dry gently. Clean plates stay visible and look sharp.
Check For Loose Screws
Inspect the screws often to ensure they are tight. Loose screws can cause the plate to rattle or fall off. Use the right screwdriver to tighten them carefully. Replace rusty screws with new ones to prevent damage.
Protect Against Rust
Apply a thin layer of clear coat or anti-rust spray on the screws. This stops rust from forming and keeps the plate secure. Avoid spraying directly on the plate numbers to keep them clear.
Replace Damaged Plates Quickly
Cracks, bends, or faded numbers make the plate hard to read. Replace damaged plates immediately to avoid fines or problems with the law. A fresh plate keeps your Giulia looking neat and legal.
Frequently Asked Questions
How Do I Install A Front License Plate On Alfa Romeo Giulia?
To install the front license plate, gather the mounting kit and screws. Align the bracket with pre-drilled holes, then securely fasten the plate using a screwdriver. Ensure the plate is straight and tightly fixed to avoid vibrations while driving.
What Tools Are Needed For Alfa Romeo Giulia Plate Installation?
You need a screwdriver, mounting bracket, screws, and a drill if holes are absent. A level can help align the plate perfectly. Having these tools ready makes the installation process smooth and efficient.
Is Drilling Required To Mount The Front License Plate?
Usually, Alfa Romeo Giulia has pre-drilled holes for mounting. If holes are missing, carefully drill using a proper drill bit. Always measure twice to avoid misalignment or damage during drilling.
Can I Install A Front Plate Without A Mounting Bracket?
Installing without a mounting bracket is not recommended. The bracket ensures secure attachment and prevents damage to the vehicle’s front bumper. Use the official mounting kit for proper fit and durability.
Conclusion
Installing the front license plate on your Alfa Romeo Giulia is simple. Follow the steps carefully, and take your time. Use the right tools to avoid damage. Make sure the plate is secure and straight. This keeps your car legal and neat.
A well-installed plate shows you care about your car. Now, your Giulia looks complete and ready for the road. Enjoy the drive with confidence and style.